Arduino & ATtiny Temperature Display [Part - 1: Breadboarding]
Looking to make yourself a Tall-FatFree-TemperatureDisplay? I believe you’ve come to the right place.
This is a walk-through of what was involved in creating a Temperature Display using the TMP36 temperature sensor and the Sparkfun Seven Segment Bubble Display. We first perfect our recipe by flushing out the circuit and code with an Arduino Uno, and then make it fat-free by moving that sketch to a $2.50 ATtiny84 microcontroller. This is a great experiment if you’re relatively new to the world of Arduino or trying out the ATtiny for the first time.
Here is the menu and some pictures of what we’ll be serving today.
Part 1 - Breadboarding: Temperature Display with an Arduino
Part 2 - Perfboard Prototype: of Temperature Display with an ATtiny84 [Coming Soon!]
Part 3 - PCB Design: Making it all Permanent with a PCB [Coming Soon!]


Bill of Materials #
Part 1 of tutorial #
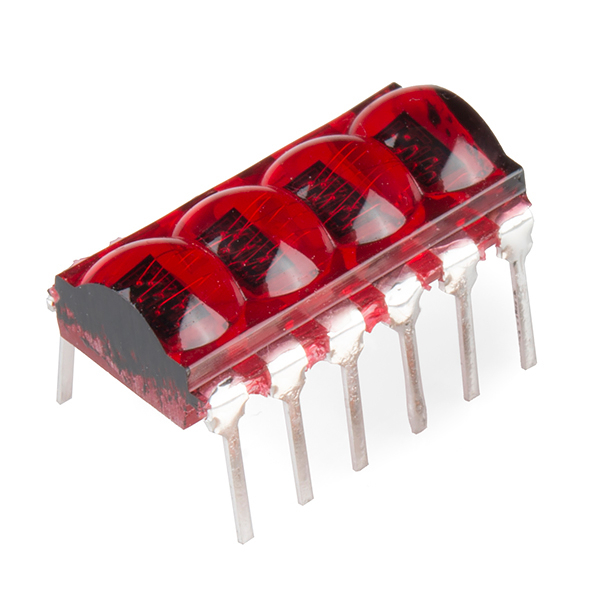
- Bubble display
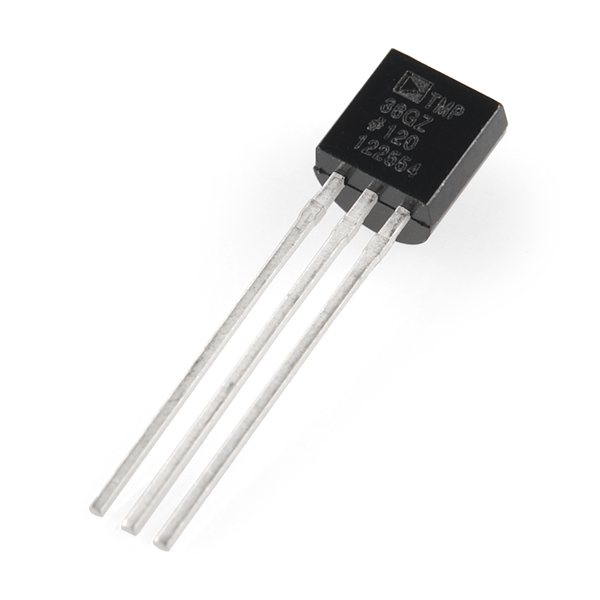
- TMP36 - Temperature Sensor
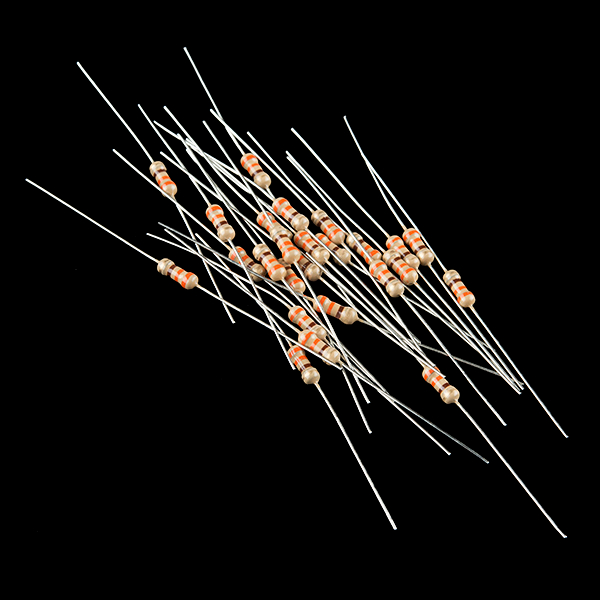
- 330Ohm Resistors [x4]
- Jumper wires
- Breadboard
- Arduino Uno or the cheaper Sparkfun Redboard
 |
 |
 |
 |
 |
 |
Temperature Sensor with Arduino [Part - 1] #
Step 1: Testing the Bubble Display #
Getting some code up and running #
Sparkfun has a very good tutorial that will help us get started with the Bubble Display. Follow the tutorial until you reach the section Example 1: Counter.
In summary, the following should have been done by now:
- Hook up the Bubble display as shown in this Sparkfun image

- Download SevSeg library and load the Example 1 - Counter Sketch onto the Arduino.
- Get the Counter example up and running.
A shallow dive into the SevSeg library #
The counter example uses 3 functions of the SevSeg class, this is what they do:
myDisplay.begin(...)- Tells the SevSeg driver which pins (of the Arduino/ATtiny) are mapped to which segment/digit of the displaymyDisplay.SetBrightnes(int_range{0,100})- By now you’ve noticed that the Bubble Display has only one set of pins for the segments of all 4 digits.
- A string is displayed by flashing (or displaying) each character of the “display-string” for a short period of time, one at a time. The 4 digits are cycled through continuously and this is what makes the display string stick on the display.
- The brightness of the display is controlled by the period between each character flashing. This period is defined by
FRAMEPERIOD, defined inSevSeg.h. - Now, the
SetBrightness()function accepts input as a percentage-scale (0 to 100), this percentage-scale is converted to the more relevant time-scale (0 toFRAMEPERIOD) using the Arduino standard library map function. This is a very useful function and read this to understand exactly how the map function does the translation.
myDisplay.DisplayString(display-str, dp-location)-- Displays the given string, and places the decimal-point at the appropriate location, on the Bubble Display.
In
SevSeg.h, thecharacterArray[]stores the character-to-SevSeg bit-mapping. We see the keywordPROGMEMused along with the array, like this://This is the combined array that contains all the segment configurations for many different characters and symbols const prog_uint8_t characterArray[] PROGMEM = { // ABCDEFG Segments 0b1111110, // 0 0b0110000, // 1 0b1101101, // 2 0b1111001, // 3 0b0110011, // 4 0b1011011, // 5 0b1011111, // 6 0b1110000, // 7 0b1111111, // 8 0b1111011, // 9 0b1110111, // 10 "A" 0b0011111, // 11 "B" ... ... }Now,
PROGMEMis called a “Keyword-Modifier” and to understand what it does, we need to understand the types of memories present in the Arduino/ATtiny/ATmega. As mentioned in this Arduino Learning Page - there are 3 types of memories with their sizes in an Arduino Uno - Flash/ProgramMemory(32KB), SRAM (2KB) and EEPROM (1B). Quoting the above page:When you create variables with the Arduino language such as
char message[] = "I support the Cape Wind project.";You are copying 33 bytes (1 char = 1 byte, plus terminating null) from program memory into SRAM before using it. 33 bytes isn’t a lot of memory in a pool of 1024 bytes, but if the sketch requires some large unchanging data structures - such as a large amount of text to send to a display, or a large lookup table, for example - using flash memory (program memory) directly for storage may be the only option. To do this, use the PROGMEM keyword.
To use the
PROGMEMkeyword you have to#include<pgmspace.h>. Visit the Arduino Reference for some more information onPROGMEM.
Step 2: Testing the TMP36 sensor #
Now that we have a hang on the Display, it is time to try out the Temperature Sensor and understand how that works.
Note: Don’t pull off the breadboard connections that you just made for the Bubble Display. The TMP36 uses a different pin on the Arduino. Just carry on with the below steps and let the Display and its hookups sit on the board as is.
Adafruit has a very good tutorial on the TMP36. Follow the tutorial, download the sketch and observe the sensor working. In summary:
- You should’ve hooked up the TMP36 as shown in this Adafruit image

Temp in °C = [(Vout in mV) - 500] / 10- The output is offset by 500 because the TMP36 is designed to measure negative temperatures as well. So a Vout reading of 0 to 500 indicates a -negative temperature, and you divide by 10 because the resolution is 10mV/degree-centigrade
Step 3: Putting it together #
At this point we have the Bubble Display, Temperature Sensor and the Arduino hooked up the way we want them; all we need to do is modify and combine the above 2 sketches (Bubble Display Counter Sketch & TMP36 sketch) and have the temperature displayed on the Bubble Display.
Here is the sketch that does exactly just that. I’ve removed the counter logic from the Sparkfun Counter Sketch, and refactored the code to move the Adafruit temperature sensing code into a function:
int getTemp(boolean tempType)
{
   //getting the voltage reading from the temperature sensor
   int reading = analogRead(sensorPin);

   // converting that reading to voltage, for 3.3v arduino use 3.3
   float voltage = reading * 5.0;
   voltage /= 1024.0;

   // print out the voltage
   Serial.print(voltage); Serial.println(" volts");

   // now print out the temperature
   float temperatureC = (voltage - 0.5) * 100 ;  //converting from 10 mv per degree wit 500 mV offset
                                                 //to degrees ((voltage - 500mV) times 100)
   Serial.print(temperatureC); Serial.println(" degrees C");

   // now convert to Fahrenheit
   float temperatureF = (temperatureC * 9.0 / 5.0) + 32.0;
   Serial.print(temperatureF); Serial.println(" degrees F");
   if(tempType == 0)
   {
      return int(temperatureC);
   }
   else
   {
     return int(temperatureF);
   }
}
The main loop essentially fetches the temperature in Centigrade and Fahrenheit, at certain intervals, and displays them with the SevSeg library’s DisplayString function call:
void loop()                     // run over and over again
{
   // At 500 display Centigrade, at 1000
   // .. display Faranheit, clear interval
   // .. cnt at 1000
   if(interval == 500)
   {
     temperature = getTemp(0);
     sprintf(tempString, "%1s%3d", "C", temperature);
     interval++;
   }
   else if(interval == 1000)
   {
     temperature = getTemp(1);
     sprintf(tempString, "%1s%3d", "F", temperature);
     interval = 0;
   }
   else
   {
     interval++;
   }

   // Display
   myDisplay.DisplayString(tempString, 0);
   delay(5); //waiting a second
}
…. And with that we now have a Temperature-Display and we’re at the end of PART - 1.
Download this sketch from #
https://github.com/subbdue/TinyTemperatureBubbleDisplay
…Continue on to Part 2 [Coming Soon!] #
Credits & Acknowledgements
All Sparkfun and Adafruit images have been linked from Source